How to Make a Queen Bed Frame: DIY Guide

Building your own queen bed frame is a rewarding DIY project that can save you money and give you a sense of accomplishment, whether you live in an apartment or a house. With the right materials, tools, and step-by-step instructions, you can create a sturdy and stylish bed frame that perfectly fits your bedroom decor. In this comprehensive guide, we'll walk you through the process of making a queen bed frame from start to finish.
Tools and Materials for Making a Queen Bed Frame
Before diving in, gather the essential tools and materials:
Tools
- Tape measure: For taking accurate measurements of your workspace and materials.
- Pencil: For marking cut lines and measurements on the wood.
- Saw: You can use a circular saw, miter saw, or hand saw, depending on your preference and available tools.
- Drill with assorted bits: Necessary for drilling pilot holes and countersinking screws.
- Countersink drill bit: This specialized bit allows you to create a recess for screw heads, resulting in a smooth, flush finish.
- Kreg Jig (optional, but recommended): This pocket hole jig system creates angled holes for concealed joinery, making assembly easier and stronger.
- Sander: For smoothing out the wood surfaces before finishing.
- Safety glasses: Protect your eyes from sawdust and flying debris.
- Work gloves: To prevent splinters and provide a better grip on the materials.
Materials
- Lumber: You'll need 2x4s, 2x6s, and 1x4s. The specific lengths will depend on your bed frame design and desired dimensions.
- Wood screws: Choose screws of the appropriate length and type for your lumber thickness.
- Wood glue: For creating strong, long-lasting joints.
- L-brackets: These metal brackets will add extra support and stability to the frame's corners.
- Wood finish (stain or paint, optional): If you want to add color or enhance the wood's natural beauty, choose a high-quality stain or paint.
Essential Measurements for Making a Queen Bed Frame
A standard queen-size mattress is 60 inches wide and 80 inches long. For your DIY queen bed frame, add a few extra inches for a comfortable overhang, aiming for approximate dimensions of:
- Headboard/Footboard: 62 inches wide
- Side Rails: 82 inches long
You can adjust the height to suit your preferences, but a common height range is between 12 and 18 inches.
Selecting Your Design for Queen Bed Frame
There are countless design options for your queen bed frame, so take some time to consider your personal style and the overall aesthetic you want to achieve in your bedroom. Here are a few popular styles to inspire you:
- Simple Platform Bed: A minimalist design with clean lines, perfect for a contemporary or modern space.
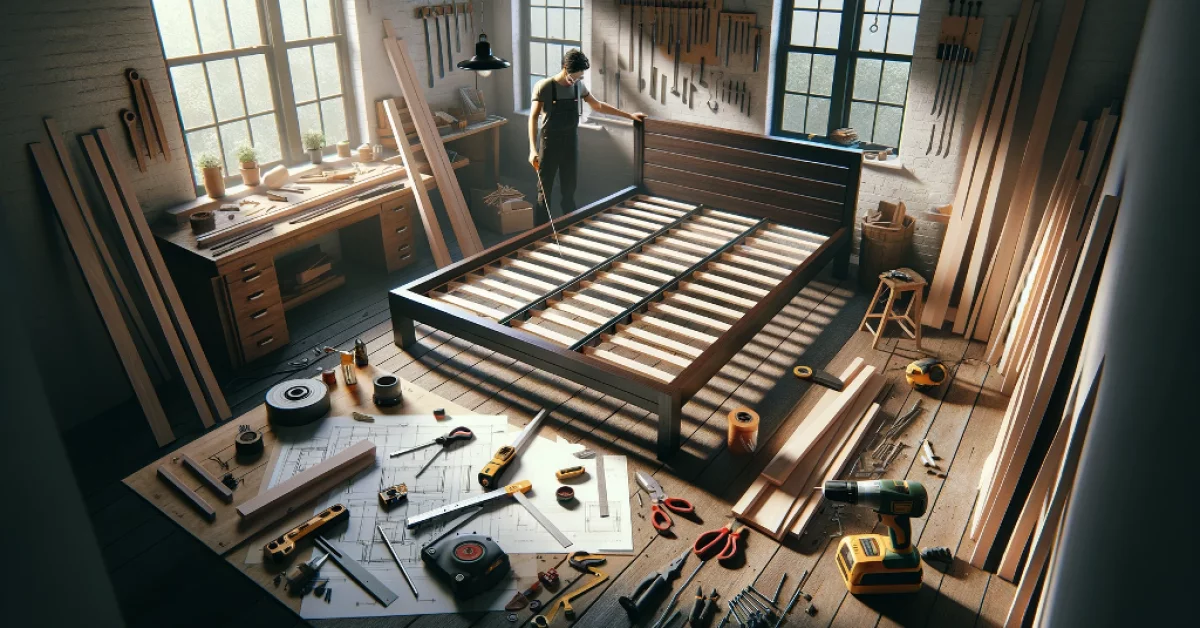
- Bed Frame with Slats: This design incorporates evenly spaced slats that provide additional mattress support and can add visual interest.
- Storage Bed: If you're looking to maximize space, consider a design that incorporates drawers or shelves underneath the frame for extra storage.
- Headboard and Footboard: A more traditional style that creates a finished look, with a headboard and footboard framing the bed.
Step-by-Step Guide for Making a Queen Bed Frame

Once you've gathered your materials and selected your design, it's time to start building! Let's break down the construction process:
Step 1. Constructing the Base
-
Cut the lumber: Using your tape measure, pencil, and saw, carefully cut your 2x6s for the headboard/footboard and your 2x4s for the side rails to the desired lengths.
-
Assemble the headboard and footboard: If your design includes a headboard and footboard, start by attaching these pieces using wood glue and screws (or a Kreg Jig for concealed joinery). For added strength, consider adding L-brackets on the inside corners. Clamp the pieces together while the glue dries.
-
Assemble the side rails: Follow the same process as the headboard/footboard, using wood glue, screws, and L-brackets if desired.
-
Connect all the pieces: With the headboard, footboard, and side rails assembled, it's time to attach them together. Apply wood glue to the end surfaces, then secure the side rails to the headboard and footboard using screws and L-brackets for extra stability.
Step 2. Adding Support
-
Center support beam: Cut a 2x4 to fit the length of the bed frame (typically 82 inches for a queen). Attach this center support beam to the middle of the side rails using wood glue and screws. This beam will provide additional support for your mattress, preventing sagging in the middle.
-
Slats (optional): If you prefer bed slats for mattress support instead of a solid platform, cut 1x4s to span the width of the bed (approximately 62 inches). Space these slats evenly along the side rails and center support beam, attaching them with wood glue and screws.
Step 3. Finishing Touches
-
Sanding: Once the frame is assembled, use your sander to smooth out any rough edges or imperfections in the wood. Start with a coarse grit sandpaper and work your way up to a finer grit for a smooth finish.
-
Finishing: If you want to add color or enhance the natural beauty of the wood, apply a high-quality stain or paint to the entire frame. Follow the manufacturer's instructions for proper application and drying times.
-
Attaching your mattress: After the finishing touches are complete and the frame is fully dry, carefully place your queen mattress on top of the bed frame, and enjoy your new, handmade piece of furniture. Remember, you can also paint wicker bedroom furniture.
Remember, building a queen bed frame is a project that allows for creativity and customization. Don't be afraid to make adjustments or add personal touches to suit your unique style and preferences. With patience, attention to detail, and a little elbow grease, you'll have a beautiful, one-of-a-kind bed frame that you can be proud of.
Tips and Considerations for Making a Queen Bed Frame

Building a queen bed frame can be a satisfying project, but there are a few tips and considerations to keep in mind:
Wood Selection
Choose the right type of wood for your bed frame based on your desired look, durability, and budget. Hardwoods like oak or maple are more expensive but offer strength and longevity, while softwoods like pine or cedar are more affordable but may require additional reinforcement.
Mattress Support
Make sure your bed frame design provides adequate support for your mattress. If you're using slats, space them no more than 3-4 inches apart to prevent sagging. Alternatively, you can use a solid platform or a box spring for proper mattress support.
Headboard and Footboard
If your design includes a headboard and footboard, consider the height and style that best suits your bedroom. Taller headboards can create a dramatic focal point, while shorter ones offer a more minimalist look.
Storage and Organization
Incorporate built-in storage solutions like shelves or drawers into your queen bed frame design. This can help maximize space and keep your bedroom organized.
Safety and Stability
Always prioritize safety when building your bed frame. Use sturdy materials and secure all joints properly to prevent wobbling or collapsing. Consider adding reinforcements or additional support if needed.
Customization and Personalization for Making a Queen Bed Frame
One of the great benefits of building your own queen bed frame is the ability to customize it to your specific preferences. Here are some ideas to make your bed frame truly unique:
Style and Design
Experiment with different styles and designs to create a bed frame that reflects your personal taste. You can incorporate intricate carvings, curved lines, or unique joinery techniques to add visual interest.
Color and Finish
Beyond staining or painting the wood, you can explore distressing techniques, whitewashing, or even decoupage to achieve a one-of-a-kind finish for your bed frame.
Accessories and Accents
Consider adding decorative accents like metal hardware, upholstered panels, or lighting fixtures to enhance the overall look and functionality of your bed frame.
Repurposed Materials
Get creative by incorporating repurposed materials like reclaimed wood, metal pipes, or vintage elements into your bed frame design. This can give your project an eco-friendly and unique twist.
Conclusion
According to experts who write for us on real estate and home improvement, building a queen bed frame is a challenging but rewarding project. With careful planning, the right materials, and a bit of patience, you can create a beautiful and functional piece of furniture that will last for years to come.
Remember, safety is paramount when working with tools and lumber. Always wear safety glasses and gloves, and follow the manufacturer's instructions for your tools.
Now that you know how to make a queen bed frame, it's time to roll up your sleeves and get started. Happy building!
More to Read:
Previous Posts:


